Blog

  • Easy Vegan Golden Thai Curry (The Ultimate One-Pot Recipe)

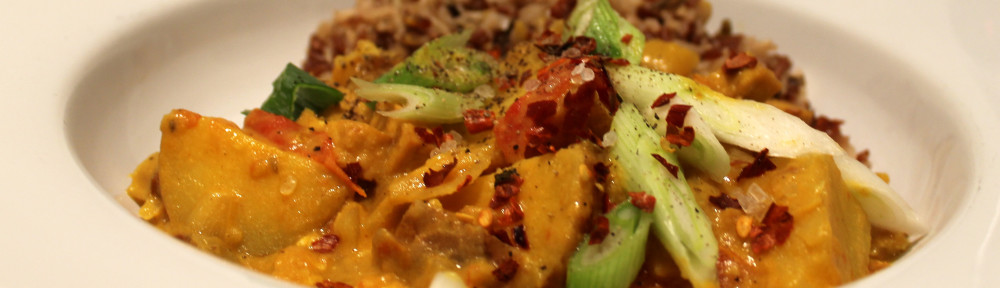
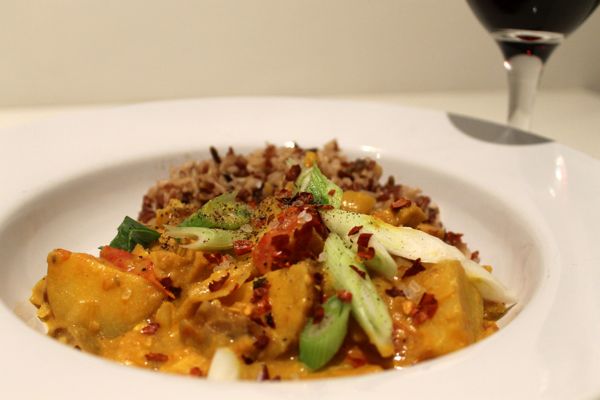
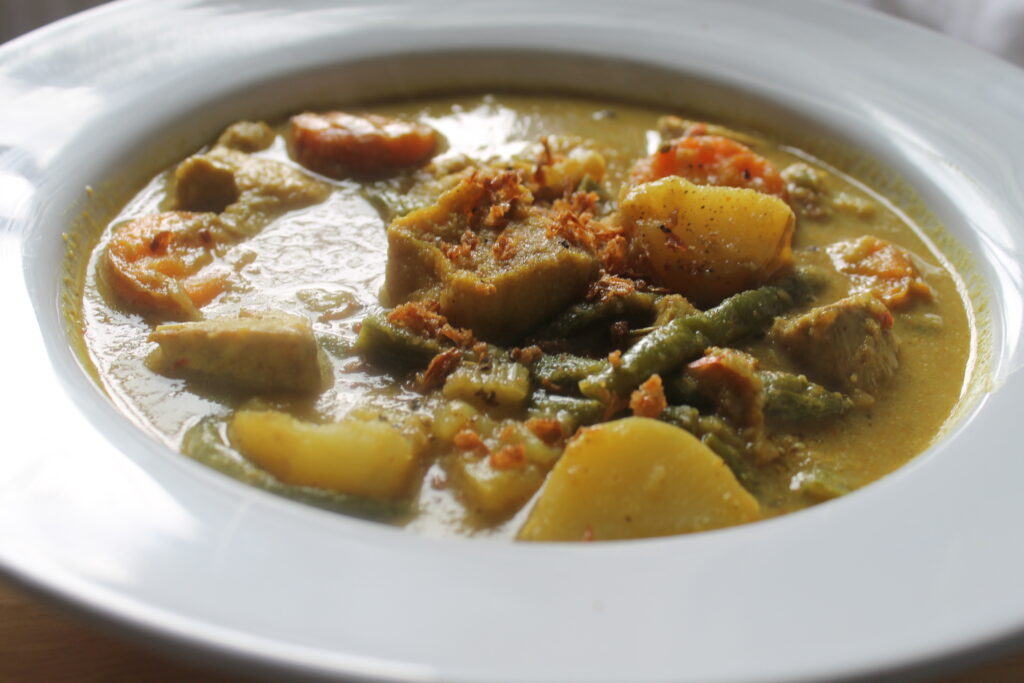
    Easy vegan golden thai curry served with rice

    Why You Will Love This Easy Vegan Golden Thai Curry

    This vibrant, creamy easy vegan golden Thai curry is the ultimate plant-based comfort food, packed with aromatic spices and layered flavours. The sauce is rich from the coconut milk, while tempeh and tofu puffs add wonderful protein and texture. Carrots add a natural sweetness, and delicious new potatoes and green beans add perfect bite and structure to this golden Thai curry

    Serve your easy vegan golden Thai curry alongside your preferred steamed rice—I highly recommend long-grain brown rice or a mixture of brown rice and Thai Riceberry* (a nutrient-dense wholegrain type of purple rice that has been crossed with jasmine rice). 

    Closeup of creamy easy vegan golden thai curry with tofu puffs and carrots
    Print
    clock clock iconcutlery cutlery iconflag flag iconfolder folder iconinstagram instagram iconpinterest pinterest iconfacebook facebook iconprint print iconsquares squares iconheart heart iconheart solid heart solid icon

    Easy Vegan Golden Thai Curry


    5 Stars 4 Stars 3 Stars 2 Stars 1 Star

    No reviews

    • Author: Carrots and Claret
    • Total Time: 1 hour
    • Yield: 4 1x
    • Diet: Vegan

    Description

    This vibrant, creamy Golden Thai Curry is the ultimate plant-based comfort food. Packed with aromatic spices, it features a rich coconut milk sauce loaded with protein-rich tempeh, tofu puffs, carrots, new potatoes, and green beans. An easy, flavorful, and hearty vegan weeknight dinner.


    Ingredients

    Scale

    1 tablespoon of neutral oil

    200g (1 and 1/4 cups) of tempeh

    1 large onion, peeled

    6 cloves of garlic, peeled

    4 red Thai chillies (or fewer to taste, this will be quite spicy!)

    1 cup chopped celery (optional*)

    4 tablespoons of Mae Ploy Yellow Curry Paste* (see notes)

    1 tablespoon of turmeric

    1 teaspoon of ground cumin

    1 teaspoon of ground corriander

    1 teaspoon of salt (or more to taste)*

    1/2 teaspoon of black pepper

    2 large carrots chopped into 2cm (3/4 inch) rounds* (see notes)

    2 cups, 500 ml water

    300g (2 cups) of new potatoes, larger ones cut in half

    200g (2 cups) green beans, spiny ends removed and chopped in half

    400ml (1 and 2/3 cups) coconut milk*(see notes)

    1 tablespoon of sugar

    6 tofu puffs, halved* (see notes)

    20g, 1 cup Thai basil, stems removed

    1 lime, juiced

    steamed rice, lime wedges and crispy fried onions to serve, optional


    Instructions
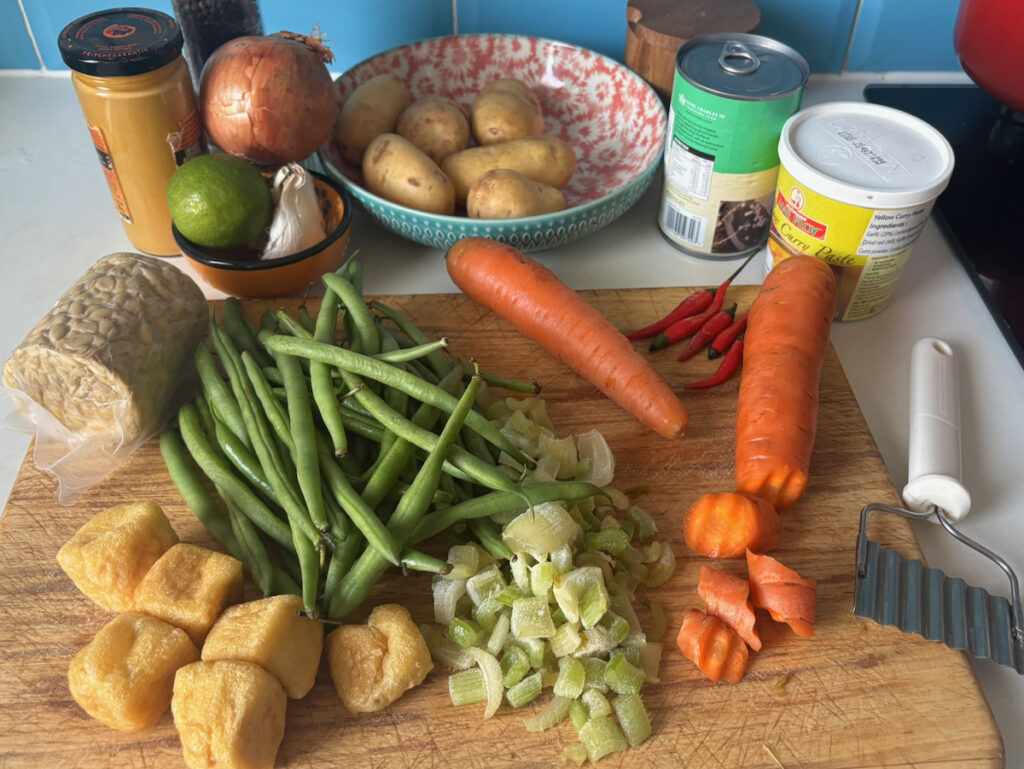
    Ingredients layout on a wooden board for Thai yellow curry, featuring fresh green beans, chopped celery, diced carrots, and new potatoes.

    1. Fry the Tempeh: Heat the tablespoon of oil on a low setting in a large pot or Dutch oven for which you have a lid. Add the chopped tempeh and fry on each side for 5 minutes, until golden brown. Remove with a slotted spoon and set aside for later.
    2. Prep the Paste: Blend the onion, chillies and garlic into a rough paste (Using a food processor, blender or stick blender, adding a few drops of water if necessary, alternatively finely chop by hand).
    3. Sauté the Aromatics: Add this blend to the pot in which the tempeh was fried. Stir and sauté for about 3 minutes.
    4. Toast the Spices: Add the tablespoon of turmeric, the teaspoon of cumin, the teaspoon of corriander, the 4 tablespoons of Mae Ploy curry paste, half a teaspoon of black pepper and the teaspoon of salt and stir to coat the onion blend.
    5. Coat the Veggies: Add the chopped carrots and celery and stir to coat.
    6. Simmer the Carrots (Covered): Add 2 cups of water, increase the heat, bring to the boil, lower the heat, put on the lid and simmer covered for 12 minutes.
    7. Add the Potatoes (Covered): Add the chopped potatoes, replace the lid, and simmer covered for another 12 minutes.
    8. Add Coconut Milk and Beans (Uncovered): Check that the carrots and potatoes are slightly soft and then add the green beans, the tablespoon of sugar and the coconut milk. Leave the lid off and cook uncovered for a further 5 minutes, or more depending on how soft or crunchy you prefer your green beans.
    9. Fold in Protein and Basil: Stir in the tofu puffs, the fried tempeh and the Thai basil.
    10. Finish and Serve: Squeeze over the lime juice. Serve with steamed rice and topped with crispy fried onions and sliced red chillies if desired.
     

    Notes

    * Thai Riceberry is a nutrient-dense whole-grain hybrid of jasmine rice and purple rice, high in antioxidants. I buy it online and mix it with brown rice. Its a great contrast to this easy vegan Thai golden curry.

    * Adding celery is optional, I always have some washed and chopped in my freezer and add it straight from there.  It adds its mild flavour and another texture to the curry.

    * Mae Ploy Yellow Curry Paste is available in Asian supermarkets and online, it’s a great short cut but you can always make your own paste.  It comes in tubs and after opening I just put the whole thing in the freezer and scoop it out as needed.

    * I use a wavy steel vegetable cutter to cut the carrots on a diagonal to make interesting rounds.  This is entirely optional!

    * Start with 1 teaspoon of salt. Taste the sauce right before adding your Thai basil leaves at the end, and add an extra ¼ teaspoon if the spices need a boost!

    * I use full fat coconut milk,  whilst high in saturated fat and calories, full-fat coconut milk is a wholefood and when paired with high fibre vegetables and lean plant proteins it acts as a highly efficient, clean fuel source with antimicrobial and anti-inflammatory properties. It makes a delicious creamy characteristic sauce.  But you can of course substitute this for a light version if you wish.

    *Tofu puffs can be found in the chilled cabinets in Asian supermarkets, unused puffs can be frozen for later use and used straight from the freezer.  Alternatively regular firm tofu can be used and fried with the tempeh.

    *Red peppers, or other vegetables can be used in place of the carrots.  If carrots aren’t used omit the initial 10 minute cooking time and go straight to adding the potatoes after the water, adding the peppers towards the end.  You can also add handfuls of baby spinach, stirred through at the end.

    • Prep Time: 10
    • Cook Time: 50
    • Category: Curry
    • Method: Saute and Boil
    • Cuisine: Thai

    Nutrition

    • Serving Size: 4
    • Calories: 506
    • Saturated Fat: 17.5g
    • Unsaturated Fat: 14.6g
    • Carbohydrates: 41.3g
    • Fiber: 11.2g
    • Protein: 19.7g

    How to Store Leftover Golden Thai Curry

    If you have any leftover easy vegan golden thai curry, let it cool completely to room temperature. Transfer the golden thai curry into an airtight container and store it in the refrigerator for up to 3 days. 

    When you are ready to enjoy your easy vegan golden thai curry again, simply reheat it gently on the stovetop over medium-low heat, adding a splash of extra coconut milk or water if the sauce has thickened too much. 

    Ingredient Substitutions for Golden Thai Curry

    One of the best things about this easy vegan golden thai curry recipe is how adaptable it is. If you cannot find specific ingredients, here are some simple swaps you can make while keeping the authentic flavors intact: 

    • The Protein: If you don’t have tofu puffs or tempeh, you can easily use extra-firm pressed tofu, chickpeas, or vegan chicken pieces in this golden thai curry
    • The Vegetables: Feel free to swap the green beans or carrots for bell peppers, broccoli florets, or bamboo shoots. They all taste incredible soaking up the creamy easy vegan golden thai curry sauce. 
    • The Paste: If you don’t have access to a specific golden or yellow paste, a high-quality vegan red curry paste works beautifully as a base for this golden thai curry dish. 

    As an Amazon Associate, I earn from qualifying purchases.
  • Bircher Muesli with Mango and Blackcurrants

    Bircher Muesli with Mango and Blackcurrants

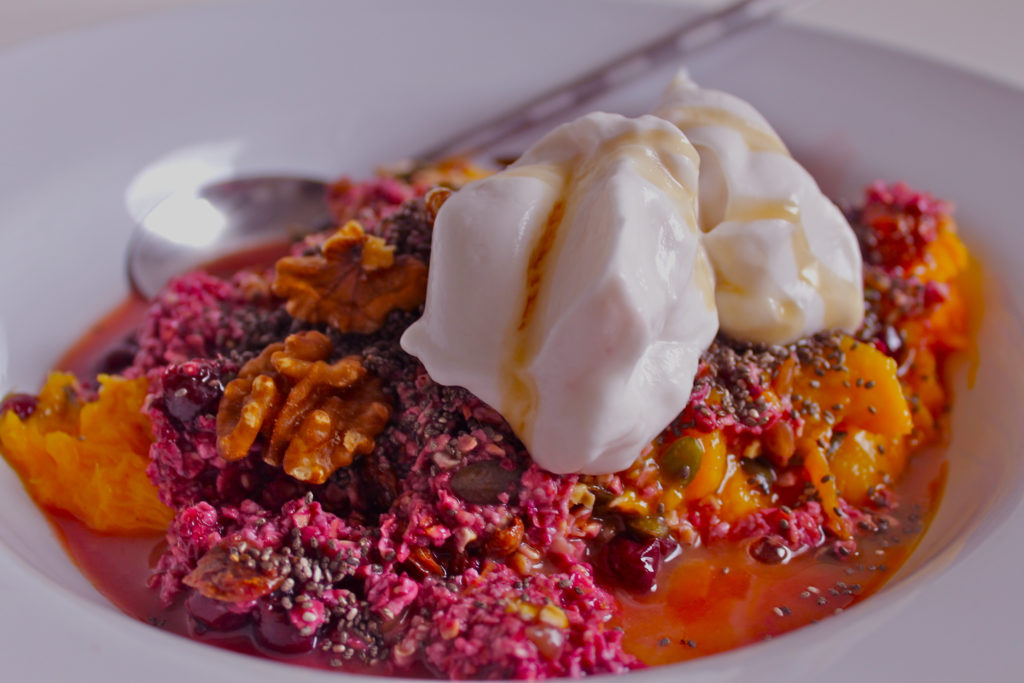
    Bircher Muesli with Mango

    Easy Bircher Muesli with Mango and Blackcurrants (Vegan)
    If you are looking for a vibrant, make-ahead breakfast that fills you up and tastes like dessert, this Bircher Muesli with Mango is the ultimate answer. This recipe combines the tropical sweetness of ripe mangoes with the sharp, bold flavor of dark blackcurrants. It is the perfect balance of sweet and tart, making it a great option for a quick morning meal, a healthy desktop lunch, or a guilt-free evening treat.
    Choosing a raw oat breakfast like a Bircher Muesli with Mango ensures you start your day with plenty of dietary fibre and slow-release energy, without any refined sugars. Let’s look at why this specific combination is so fantastic for your morning routine.


    Print
    clock clock iconcutlery cutlery iconflag flag iconfolder folder iconinstagram instagram iconpinterest pinterest iconfacebook facebook iconprint print iconsquares squares iconheart heart iconheart solid heart solid icon

    Bircher Muesli with Mango and Blackcurrants


    • Author: KL
    • Total Time: 0 hours
    • Yield: 1 large bowl (or 2 desserts) 1x
    • Diet: Vegan

    Description

    A really colourful and delicious recipe for breakfast, lunch, or even dessert. The sweetness of the mangoes is a great counterfoil to the tart blackcurrants. Not usually on “superfoods” lists, blackcurrants are unsung nutritional heroes with more antioxidant power than blueberries. Use canned ones in juice, frozen, or fresh if you can get them. It works really well with overripe mangoes—if yours aren’t fully ripe, just add some extra fruit juice


    Ingredients

    Scale

    The Base:

    50g oats (approx. 1/2 cup or 150ml)

    1 handful sultanas

    1.5 tbsp sunflower seeds

    1.5 tbsp pumpkin seeds

    The Fruit & Liquid:

    ½ large highly ripe mango (juice and pulp) or 1 small ripe mango

    150g canned blackcurrants in juice (including the juice)

    Optional Toppings:

    2 tbsp chia seeds

    1 scoop coconut milk yoghurt

    1 handful walnuts

    1 drizzle maple syrup


    Instructions

    Combine the dry base: In a large lidded container, mix the oats, pumpkin seeds, sunflower seeds, and sultanas.

    Add the fruit: Pour the mango juice, mango pulp, blackcurrants, and blackcurrant juice directly over the oat mixture.

    Soak: Cover the container tightly and place it in the fridge overnight, or for at least 2 hours.

    Serve: Give the muesli a thorough stir, transfer it to serving bowls, and top with chia seeds, walnuts, coconut milk yoghurt, and a drizzle of maple syrup if desired.

    Notes

    Flexibility: The ingredients list is a guide. Feel free to swap in whatever seeds or dried fruits you have available in your pantry.

    • Prep Time: 5 minutes plus overnight soaking
    • Category: Dessert or Breakfast
    • Method: Raw
    • Cuisine: Healthy

    Nutrition

    • Serving Size: Whole Recipe
    • Calories: 505
    • Sugar: 33g (all natural)
    • Fat: 18g
    • Saturated Fat: 2.5g
    • Carbohydrates: 72g
    • Fiber: 11g
    • Protein: 14g

    The Health Benefits of Blackcurrants

    While exotic berries usually dominate trendy “superfoods” lists, blackcurrants are the unsung nutritional heroes of the fruit world. They actually pack significantly more antioxidant power than blueberries, alongside a massive dose of Vitamin C.Pairing these tart little berries with oats and seeds gives you a brilliant boost of fibre, healthy fats, and sustained energy to power you through your day. This Bircher Muesli with mango and blackcurrants is full of antioxidants.

    Tips for the Perfect Bircher Muesli with Mango

    The Liquid Ratio: As a general rule of thumb, you want about twice the volume of liquid to oats. This ensures the oats absorb all the delicious flavors without becoming too dry or unpleasantly mushy.Choosing Your Fruit: This recipe works beautifully with overripe mangoes because they are naturally sweeter and juicier. If your mango isn’t fully ripe, simply add a splash of extra fruit juice or apple juice to hit that perfect liquid balance.Fresh, Frozen, or Canned: You can use fresh or frozen blackcurrants if you have them on hand. However, canned blackcurrants in juice work incredibly well here because you can use the juice directly in the oat base.Prep Ahead: If you are organized, mix everything up in a lidded container the night before and let it soak in the fridge. If you forget, don’t worry! You can quickly whip it up in the morning, leave it for two hours, and it will be perfectly ready by lunchtime.

    Simple Ingredient Variations and Substitutions

    One of the best things about a Bircher Muesli with Mango is how incredibly adaptable it is to whatever you currently have sitting in your pantry cupboards.The Seed Mix: If you do not have pumpkin seeds or sunflower seeds on hand, you can easily swap them out for chia seeds, hemp hearts, or ground flaxseeds to keep that healthy fat profile.The Dried Fruit: Dried sultanas provide a lovely burst of chewiness, but chopped dates, dried cranberries, or raisins make fantastic substitutes.The Liquid Base: This recipe relies on the natural juices of the fruits, but you can add a splash of almond milk, oat milk, or apple juice if you prefer a looser, creamier muesli texture before serving.

    Frequently Asked Questions

    Can you make Bircher muesli with frozen fruit?Yes! Frozen blackcurrants or frozen mango chunks work perfectly. Just let them thaw slightly or mix them into the oats the night before so they can defrost in the fridge overnight, releasing all their natural juices into the base.How long does this breakfast last in the fridge? Stored in an airtight, lidded container, this muesli will easily keep fresh in the fridge for up to 3 to 4 days, making it ideal for Sunday meal prep.

    Prep Ahead: If you are organised, mix everything up in a lidded container—I love using these leakproof glass meal prep jars—the night before for the bircher muesli with mangoes and let it soak in the fridge.

    The Seed Mix: If you do not have pumpkin seeds or sunflower seeds on hand, you can stock up on bulk organic sunflower seeds or swap them out for chia seeds, hemp hearts, or ground flaxseeds to keep that healthy fat profile.

    As an Amazon Associate, I earn from qualifying purchases.
  • Fusilli with Peppers and Broad Beans

    Fusilli with Peppers and Broad Beans

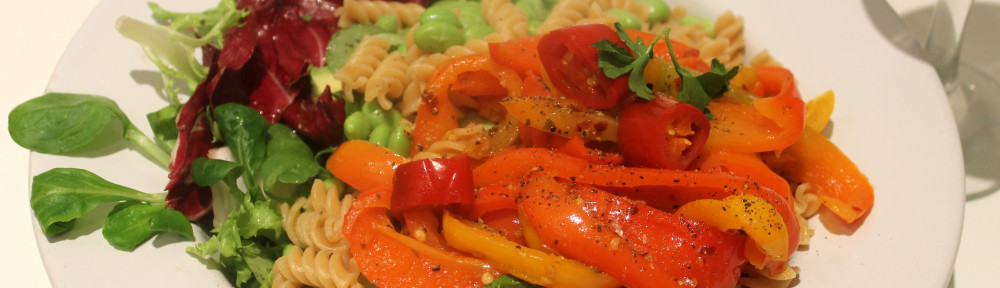
    If you are looking for a fast, wholesome weeknight meal, this fusilli with peppers and broad beans is the perfect choice. This vibrant, easy-to-prepare dish features sweet peppers, rich garlic, and a hint of spice. Beyond being incredibly delicious, the colourful bell peppers are packed with antioxidants, vitamin B6, and magnesium—a powerful nutrient combination thought to naturally reduce anxiety.

    Fusilli with Peppers and Broad Beans


    Print
    clock clock iconcutlery cutlery iconflag flag iconfolder folder iconinstagram instagram iconpinterest pinterest iconfacebook facebook iconprint print iconsquares squares iconheart heart iconheart solid heart solid icon

    Fusilli with Peppers and Broad Beans


    5 Stars 4 Stars 3 Stars 2 Stars 1 Star

    No reviews

    • Author: KL
    • Total Time: 25 minutes
    • Yield: 2 1x
    • Diet: Vegan

    Description

    This fusilli with peppers and broad beans is a vibrant and easy 25-minute Mediterranean meal featuring sweet bell peppers, broad beans, and garlic, tossed with fresh basil. Healthy, comforting, and rich in anxiety-reducing magnesium!


    Ingredients

    Units Scale

    1 tablespoon olive oil (plus extra for drizzling)

    3 bell peppers (red, yellow, and orange), sliced

    2 cloves garlic, minced

    1 teaspoon dried chilli

    1/2 teaspoon dried oregano

    1 teaspoon agave nectar (or other sweetener)

    2 cups (200g) fusilli pasta

    1 cup (150g) frozen broad beans

    45 basil leaves, torn

    Salt and black pepper, to taste

    Juice of half a lemon

    Salad leaves, to serve

    23 tablespoons jarred jalapenos (optional)


    Instructions

    Cook the peppers: Heat 1 tablespoon of olive oil in a large pan over medium heat. Add the sliced peppers and sweat them for about 10 minutes until soft.

    Add spices: Add the minced garlic, dried chilli, dried oregano, and agave nectar to the peppers. Season with salt and pepper, and stir well.

    Boil the pasta: Cook the fusilli in a pot of boiling water for 9 minutes.

    Add beans: After the pasta has cooked for 5 minutes, drop 1 cup of frozen broad beans into the same pot. Bring it back to a boil, then lower the heat to a simmer for the remaining 4 minutes.

    Save pasta water: Ladle a few tablespoons of the hot pasta water into the pan with the peppers and stir.

    Combine: Drain the pasta and beans. Tip them into the pan with the peppers. Add the torn basil leaves and stir everything together.

    Serve: Plate the dish with fresh salad leaves. Top with black pepper, a squeeze of lemon juice, a drizzle of olive oil, and the optional jarred jalapenos.


    • Prep Time: 10
    • Cook Time: 15
    • Category: Dinner
    • Method: Saute
    • Cuisine: Mediterranean

    Nutrition

    • Serving Size: per half of recipe
    • Calories: 532
    • Sugar: 11g
    • Sodium: 15mg
    • Fat: 8.5g
    • Saturated Fat: 1.2g
    • Carbohydrates: 92g
    • Protein: 18g

    Shop this recipe

    Hard-to-Find Pantry Staples

    Organic Agave Nectar: Since it is the main plant-based sweetener in the dish, linking a bulk or organic bottle on Amazon works well for readers who do not have a local health food shop.

    Premium Bronze-Die Fusilli: Explain that bronze-cut pasta has a rough surface that helps the olive oil, lemon juice, and pepper juices cling to the noodles much better than cheap supermarket pasta.

    Kitchen Essentials

    A Heavy-Duty Garlic Press: Since your recipe starts with minced garlic, linking a good stainless steel press is a natural fit.

    A Large Everyday Deep Pan / Skillet: Your recipe requires sweating 3 whole sliced peppers and tossing 200g of pasta into the same pan. A deep, wide skillet is perfect here so readers don’t spill ingredients over the sides.

    A Lemon Squeezer / Citrus Juicer: Since the dish is finished with fresh lemon juice, a handheld citrus press is an easy, high-converting impulse buy.

    As an Amazon Associate, I earn from qualifying purchases.

  • Druskininkai: Desperately Seeking Sanctuary

    IMG_7836

    I love the luxury of unwinding and being pampered in spas. I have been lucky enough to visit them all over the world. I have lost count of the number of times, with just a week to take on the Herculean task of de-stressing, that I’ve googled ‘spa, Europe and lake’. If I had carried out my searches in Lithuanian or Russian (the clientele at my new favourite spa are mostly Russian), I would have come up with Druskininkai. But I didnt, it took a Lithuanian friend coming back to London, relaxed and glowing, to introduce me to this place.

    IMG_4798

    I have been to this, well off the beaten track Lithuanian resort twice now. It took me the whole of the first week long visit to pronounce the name of the spa town with any degree of confidence (Droosk-IN-in-kye, with the emphasis on the second syllable).

    IMG_4807

    I have visited beach resort spas and have nothing against them at all. But in the summer I would rather go short haul, avoid crowded coastlines, swap the babble for babbling brooks, walk in tranquil forests and swim in chanced upon fresh water lakes. Druskininkai ticks all the boxes.

    IMG_4755

    With no Lithuanian and just a smattering of Russian in my vocabulary, in the big hotel in which I stayed on both occasions, its easy to just tune out of the noise and exist almost on a different frequency.  One English man appeared briefly on my first stay and I was most disappointed but he soon went elsewhere and on my most recent stay I heard a Norwegian man complaining loudly in English that the doctors appointment for his wife was inconvenient as she needed one hour to eat just a tiny portion of dinner.  But the rest of the time this little isolated group drank copious amounts of beer and spoke in Norwegian.

    IMG_7868

    Next, getting there, my hotel Spa Vilnius, the local fare and the good old fashioned European treatments

    As an Amazon Associate, I earn from qualifying purchases.
  • Vegetable Curry with Kidney Beans

    Vegetable Curry with Kidney Beans

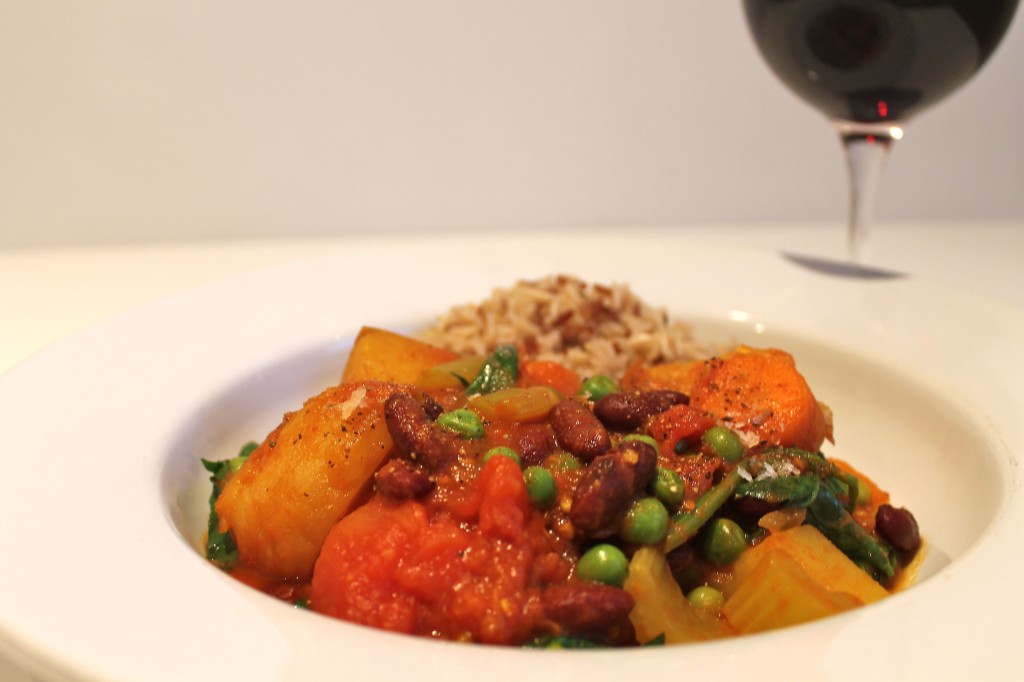
    A hearty bowl of homemade vegetable curry with kidney beans and fresh spinach, served hot over brown rice.


    Why You’ll Love This Easy Vegetable Curry


    This vibrant, plant-based curry is the ultimate comfort food for busy weeknights. It is incredibly budget-friendly, making it a fantastic option for families looking to eat healthy without breaking the bank. Because it relies heavily on staple root vegetables and affordable canned goods like kidney beans, you can easily whip this up using basic ingredients already sitting in your pantry.
    Furthermore, this dish is naturally gluten-free, low-fat, and absolutely packed with clean, plant-based protein and fiber. It reheats beautifully, making it a stellar choice for your weekly Sunday meal prep.


    Print
    clock clock iconcutlery cutlery iconflag flag iconfolder folder iconinstagram instagram iconpinterest pinterest iconfacebook facebook iconprint print iconsquares squares iconheart heart iconheart solid heart solid icon

    Vegetable Curry with Kidney Beans


    5 Stars 4 Stars 3 Stars 2 Stars 1 Star

    No reviews

    • Author: KL
    • Diet: Vegan

    Description

    A hearty, budget-friendly vegetable curry packed with chunky root vegetables, rich tomatoes, and protein-dense kidney beans. This simple, one-pot weeknight dinner is naturally vegan, gluten-free, and full of warming spices. Perfect for healthy meal prep!


    Ingredients

    Scale

    1 tbsp vegetable oil

    1-inch (2.5cm) piece of fresh ginger, finely chopped

    1 celery stick, sliced

    2 large carrots, roughly chopped

    1 medium onion, sliced

    3 cloves garlic, minced

    1 large potato, scrubbed and roughly chopped

    1/2 tsp cumin seeds (or ground cumin)

    1 tsp ground coriander

    1 to 2 tsp dried chili flakes (adjust to taste)

    1 tsp ground turmeric

    Salt and black pepper, to taste

    250ml (1 cup) vegetable stock (or water)

    1 can (400g / 14 oz) chopped tomatoes

    2 tbsp tomato purée

    1 can (400g / 14 oz) kidney beans, drained and rinsed

    100g (3.5 oz) fresh spinach, stalks separated and finely chopped, leaves sliced

    2 handfuls frozen peas

    Cooked brown rice, to serve


    Instructions

    Sauté the aromatics: Heat the vegetable oil in a large, lidded pan over medium heat. Add the chopped ginger, celery, carrots, and onion. Stir well to coat and cook for about 10 minutes until the onions begin to soften.

    Toast the spices: Add the garlic, cumin, coriander, chili flakes, turmeric, and a generous pinch of black pepper. Stir constantly for 1 minute until fragrant. Add another tiny splash of oil if the pan looks too dry.

    Simmer the vegetables: Stir in the chopped potatoes. Pour in the vegetable stock (or water), ensuring the liquid just covers the root vegetables. Season lightly with salt. Bring to a simmer, pop the lid on, and cook for 20 minutes until the carrots and potatoes are fork-tender.

    Build the sauce: Stir in the canned tomatoes, tomato purée, drained kidney beans, and the finely chopped spinach stalks. Simmer uncovered for 5 minutes to let the sauce thicken.

    Finish and serve: Stir in the frozen peas and the sliced spinach leaves. Cook for a final 2 minutes until the spinach is wilted and the peas are bright green. Taste and adjust the seasoning with extra salt and pepper if needed. Serve hot over a bed of brown rice.

    • Cuisine: Indian

    Nutrition

    • Calories: 374
    • Fat: 8.1g (low-fat, primarily from the 1 tbsp of vegetable oil)
    • Carbohydrates: 59.8g
    • Fiber: 15.8g excellent for digestion, providing over 50% of your daily target)
    • Protein: 15.4g (high-protein for a vegetable dish, thanks to the kidney beans and peas)

    Handy equipment for vegetable curry with kidney beans

    I love my Le Creuset enamelled cast iron casserole. But there are more budget friendly ones available too, such as this Valeze one

    Vegetable Curry Ingredient Substitutions


    One of the best things about a home-cooked vegetable curry is how forgiving and adaptable the recipe is. You can easily customize this dish based on what you have left in your vegetable crisper drawer:
    The Protein: If you don’t have kidney beans on hand, chick peas, black beans, or brown lentils make excellent protein-packed alternatives.
    The Veggies: Swap the regular potato for a sweet potato or diced butternut squash for a hint of natural sweetness. Diced bell peppers, cauliflower florets, or courgettes also make wonderful additions.
    The Greens: If you run out of fresh spinach, frozen spinach works perfectly, or you can swap it for chopped kale or Swiss chard.

    How to Store This Vegetable Curry


    This curry actually tastes even better the next day as the warm spices continue to develop and meld together in the sauce.
    To Store: Allow the curry to cool completely to room temperature. Transfer it into an airtight container and store it in the fridge for up to 4 to 5 days.
    To Freeze: This recipe is incredibly freezer-friendly. Pack it into freezer-safe bags or containers and freeze for up to 3 months. Thaw it overnight in the fridge before reheating.
    To Reheat: Gently warm it through in a small saucepan over medium heat, adding a splash of extra vegetable stock or water if the sauce has thickened up too much.

    As an Amazon Associate, I earn from qualifying purchases.

  • Pasta with Broad Beans, Aubergine and Green Walnut Sauce

    Pasta with Broad Beans, Aubergine and Green Walnut Sauce

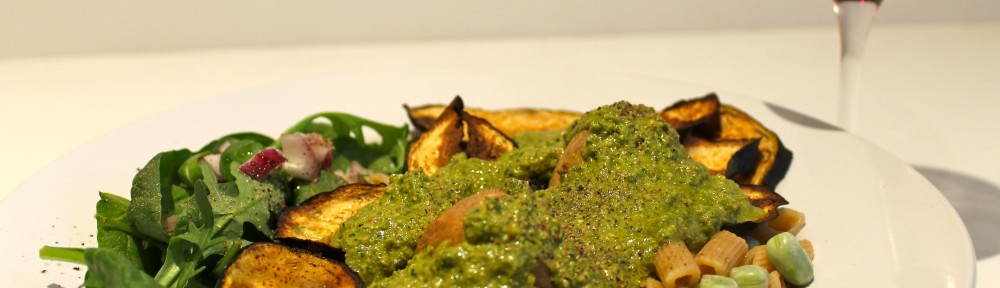
    This vibrant pasta with green walnut sauce, aubergines, and broad beans is as nourishing as it is striking! The neon-green sauce is delicious, nutritious, and packed with protein, omega-3 fatty acids, and vitamin E from the walnuts and beans. Combining pasta with baked potatoes (a nod to Sicilian, pesto-potato dishes) adds wonderful texture, and roasting the potatoes allows them to cook alongside the aubergine.

    Cooking Tips for Green Walnut Sauce

    Making a homemade green walnut sauce is an incredibly easy way to elevate your weeknight dinner. Soaking the walnuts first ensures a beautifully smooth texture that coats the wholewheat pasta perfectly. This creamy blend balances beautifully with the smoky, charred edges of the baked aubergines and hearty potatoes.

    Pasta with Broad Beans, Aubergine and Green Walnut Sauce


    Print
    clock clock iconcutlery cutlery iconflag flag iconfolder folder iconinstagram instagram iconpinterest pinterest iconfacebook facebook iconprint print iconsquares squares iconheart heart iconheart solid heart solid icon

    Pasta with Broad Beans, Aubergine and Green Walnut Sauce


    5 Stars 4 Stars 3 Stars 2 Stars 1 Star

    No reviews

    • Author: KL
    • Total Time: 45 minutes
    • Yield: 2 1x
    • Diet: Vegan

    Description

    A delicious and nutritious main course featuring roasted potatoes, tender aubergines, and a vibrant neon-green parsley and walnut sauce packed with protein and omega-3s.


    Ingredients

    Units Scale

    75g (2 and 1/2 ounces) of chopped walnuts

    4 small potatoes (about 500g or 17 and 1/2 ounces), scrubbed

    1 aubergine

    1 large bunch of flat leaf parsley, washed and with most of the leafless stalks removed

    1 tablespoon of lemon juice or cider vinegar

    1/2 teaspoon of salt

    Black pepper, to taste

    125g (4 and a 1/2 ounces) of frozen broad beans (or fresh, cook for longer)

    3 cloves of garlic, roughly chopped

    140g (5 ounces) of wholewheat pasta

    1 teaspoon of agave nectar (or other sweetener)

    Olive oil, for brushing and blending

    Salad leaves and half a finely sliced red onion to garnish


    Instructions

    Step 1: Turn the oven to 200C (425F, gas mark 7) and put the potatoes in on the top shelf. They will take about 30 minutes depending on the size.

    Step 2: In the meantime, put the chopped walnuts in a small bowl and pour on just enough boiling water to cover them (if you use more than 100ml drain some off before blending).

    Step 3: Cut the aubergine into 1/2cm (1/4 of an inch) rounds and place on a baking tray, spray or brush them with oil and bake for about 20 minutes, until golden and slightly charred in places.

    Step 4: Put the parsley, garlic, lemon juice (or vinegar), salt, pepper, olive oil, agave nectar and the soaked walnuts with their soaking liquid in a blender and blitz to a paste.

    Step 5: Cook the pasta for nine minutes (or according to the packet), adding the broad beans for the last three. Add a spoon or two of the cooking liquid to the sauce to loosen it.

    Step 6: Quarter the baked potatoes, put them on top of the pasta along with the aubergines and spoon on the sauce.

    Serve with the salad leaves and chopped onion.


    • Prep Time: 15
    • Cook Time: 30
    • Category: Dinner
    • Method: Roast
    • Cuisine: Italian

    Nutrition

    • Serving Size: 2
    • Calories: 936
    • Sodium: 600mg
    • Fat: 36g
    • Saturated Fat: 4g
    • Carbohydrates: 136g
    • Fiber: 21g
    • Protein: 29g

    Equipment Needed for the Perfect Pasta with Broad Beans, Aubergine and Green Walnut Sauce

    Wooden Chopping Board (A sturdy surface for all your vegetable prep)

    High-Speed Blender or a stick blender ( for getting the green walnut sauce smooth and creamy)

    Large Baking Tray (For roasting the aubergine rounds and potatoes evenly)

    Large Saucepan (For boiling the wholewheat pasta and broad beans)

    Colander / Pasta Strainer (To drain the pasta while saving a splash of cooking water)

    Sharp Chef’s Knife (For safely cutting the potatoes, aubergines, and onions)

    Storage and Reheating Tips


    Fridge Storage: Store the leftovers in an airtight container in the fridge for up to 3 days. Keep the fresh salad leaves and sliced red onion separate so they stay crisp.

    Make It Ahead: You can blend the green walnut sauce up to 2 days in advance. Store it in a jar in the fridge with a thin layer of olive oil poured over the top to keep its bright color.

    Best Reheating Method: Reheat the pasta, potatoes, and aubergines in a saucepan over medium-low heat. Add a splash of water or vegetable stock to loosen the walnut sauce, as it will thicken significantly in the fridge.
    Avoid Freezing: We do not recommend freezing this cooked dish. The texture of both the wholewheat pasta and the baked potatoes will become grainy and mushy once thawed.

    For another delicious pasta dish check out my delicious Penne con Melanzane

    As an Amazon Associate, I earn from qualifying purchases.

  • Tasty Tacos with Refried Beans and Guacamole

    Tasty Tacos with Refried Beans and Guacamole

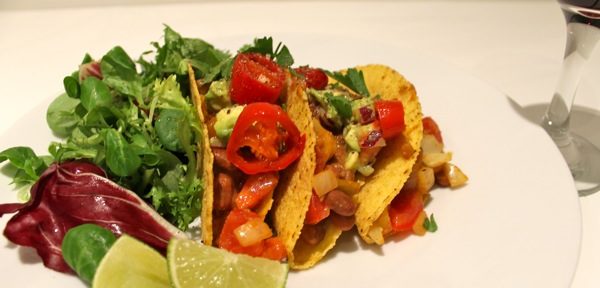
    A delicious vegan take on a Mexican favourite.   Use handy canned refried beans and tasty corn tacos for a super quick supper.  Spicy and delicious, these fast, healthy tacos remind me of a trip to Mexico.  Not a country I would have associated with vegetarianism, but nonetheless, one of the most delicious things I tasted there were tacos with avocado, cooked at the road side.

    Tacos with Refried Beans and Guacamole


    Print
    clock clock iconcutlery cutlery iconflag flag iconfolder folder iconinstagram instagram iconpinterest pinterest iconfacebook facebook iconprint print iconsquares squares iconheart heart iconheart solid heart solid icon

    Tasty Tacos with Refried Beans and Guacamole


    5 Stars 4 Stars 3 Stars 2 Stars 1 Star

    No reviews

    • Author: Karen
    • Total Time: 35 minutes
    • Yield: 6 1x
    • Diet: Vegan

    Description

    Quick and easy vegan tacos made with savoury canned refried beans, crisp taco shells, and a fresh, zesty homemade guacamole topping. Perfect for a fast, healthy weeknight supper that packs a flavourful punch!


    Ingredients

    Scale
    For the tacos:
    • 2 onions, chopped
    • A clove of garlic, minced
    • 2 green bird’s eye chilies, chopped (use one for a milder effect)
    • 1 tsp dried cumin seed
    • 2 large ripe tomatoes, chopped
    • 1 large (435g) can or 2 small (215g) cans of refried beans
    • 6 taco shells
    • Vegetable oil
    • Salt and black pepper, to taste
    For the guacamole topping:
    • 1 large ripe avocado, chopped just before serving
    • 1 large ripe tomato, chopped
    • Half a red onion, finely chopped
    • A green chili, finely chopped
    • A garlic clove, minced
    • The juice of a lime
    To serve:
    • The juice of half a lime and two lime wedges
    • A handful of chopped bottled jalapeños
    • 1 tbsp chopped flat-leaf parsley (or cilantro) (optional)
    • Tabasco sauce
    • Seasonal salad leaves

    Instructions

    1. Preheat the oven to 190°C (375°F / Gas Mark 5).
    2. Sweat the onions in a pan with a little vegetable oil and a pinch of salt for up to 10 minutes, until softened.
    3. Stir in the chopped chilies and minced garlic.
    4. Add the cumin seeds and stir, letting them toast for 2 minutes.
    5. Pour in the refried beans and season with a generous grind of black pepper.
    6. Stir in the chopped tomatoes and heat through. Squeeze the juice of half a lime over the beans.
    7. Mix the guacamole ingredients in a bowl, leaving it lightly mashed and rustic.
    8. Warm the taco shells open-side down on a baking tray for 2 to 3 minutes in the oven.
    9. Assemble the tacos by piling the warm shells with the beans, then topping with guacamole, jalapeños, and parsley/cilantro.
    10. Serve immediately with lime wedges, seasonal salad leaves, and Tabasco.

    Notes

     Makes 6 small tacos, serves two as a light meal, add rice or potatoes for a more substantial main course

    • Prep Time: 15
    • Cook Time: 20
    • Category: Vegan
    • Method: Fry and Bake
    • Cuisine: Mexican

    Nutrition

    • Serving Size: 3 tacos
    • Calories: 490
    • Sugar: 6g
    • Fat: 21g
    • Saturated Fat: 3g
    • Carbohydrates: 62g
    • Fiber: 16g
    • Protein: 15g

    As an Amazon Associate, I earn from qualifying purchases.

  • A Walk on the Wild Side: Borneo’s Rainforests

    DSCN5536

    The Semengoh Wildlife Reserve is a twelve mile drive from Kuching and well worth the trip, Borneo has beautiful beaches in the more touristy destinations of the North, but the attraction for me wasnt sun, sea and sand.  I joined a couple of tours arranged by the Bermibeh Travellers lodge (Ewe Hai Street) . They started early, and not being much of a morning person I skipped breakfast, but this was offered to me gratis by the great people at the Bermimbeh hostel while I waited for the vehicle.

    DSCN4481

    On the first trip I didnt see any of these fantastic creatures, just lots of gruesome photos of the damage they could do to you if you do see them and let them get too close.  ‘If an orangutan touches you, you always go to hospital’, our guide as the reserve told us.  These orangutans are being rehabilitated into the wild and if they dont need to come to take the food laid out for them, it’s a good sign, they are doing well.  They are orphaned or injured or have previously been kept as illegal pets and the aim is not to tame them but to help them as they fend for themselves. On my first visit we waited and waited quietly (and as usual in a group of people, some not so quietly) in the woods but they didnt come.

    DSCN6238

    My next excursion was to Jong’s Crocodile Farm, also a short drive away.  The significance of the word ‘farm’ didnt really sink in at the time, but the crocodiles that are fed for the (fairly scarce) tourists are in huge emerald green pools.  I had the place almost to myself once a small group of Malaysian sightseers had left.  Its a tranquil leafy spot with crocodiles everywhere.  Inside an enclosure a huge tailless beast languishes in a solitary pen, apparently he was born this way and would be savaged by the others outside.

    DSCN6269

    Jong’s is a pretty and surprisingly peaceful place, considering the thing to do is to wander amongst the largest and most aggressive living reptiles.

    DSCN4514

    The Ibans are tribe of Dayak people native to Borneo, the villages and long house in the rain forest are a beautful place to visit.  I couldnt help feeling at times that I was in a human zoo.  Apparently headhunting has been phased out but the dried skulls in the rafters looked a little too authentic.

    DSCN4513

    On my second visit to Semenggoh (these trips arent expensive, especially if you book them at somewhere like the Bermibih lodge, rather than a swanky hotel like the Pullman, and the entrance fee supports the centre) the guide started saying ‘look, look, over there!’ in an animated Attenborouesque stage whisper.  And there they were, these magnificent creatures.

    DSCN5555

    Semenggoh Nature Reserve

    As an Amazon Associate, I earn from qualifying purchases.

  • The Ultimate Vegan Massaman Curry (Easy One-Pot Recipe)

    The Ultimate Vegan Massaman Curry (Easy One-Pot Recipe)

    Massaman Curry

    I had my first Massaman curry in my favourite Thai restaurant; it was the only bad dish I ever had there! They forgot the tofu and added it straight from the pack when I pointed it out, the whole dish was bland and insipid. I gave it another go in a vegan restaurant and it was delicious. This is my take on a homemade Vegan Massaman Curry. I used cashews for healthy plant-based protein. There are lots of ingredients, but apart from the rice, it’s an easy one-pot vegan dinner. My version is rich, creamy, spicy, aromatic and absolutely delicious!”

    Follow along with the simple steps below to create this ultimate comforting Vegan Massaman Curry at home tonight.

    Print
    clock clock iconcutlery cutlery iconflag flag iconfolder folder iconinstagram instagram iconpinterest pinterest iconfacebook facebook iconprint print iconsquares squares iconheart heart iconheart solid heart solid icon

    Massaman Curry


    5 Stars 4 Stars 3 Stars 2 Stars 1 Star

    No reviews

    • Author: Karen
    • Total Time: 45 minutes
    • Yield: 4 1x
    • Diet: Vegan

    Description

    A rich, creamy, and aromatic Vegan Massaman Curry that makes the perfect comforting one-pot dinner. Packed with flavour, tender potatoes, and wholesome cashews for healthy plant-based protein, this easy recipe is a delicious upgrade from traditional Thai takeout.


    Ingredients

    Scale

    Section 1: Spices and Aromatics

    1 onion, diced

    4 cloves of garlic, minced

    1.5 inch piece of ginger, chopped

    0.5 teaspoon dried cumin seed

    0.5 teaspoon dried coriander

    1 tablespoon turmeric

    1 teaspoon dried chilli flakes

    black pepper to taste

    a little vegetable oil

    Section 2: The Curry Base

    4 medium potatoes, scrubbed and quartered

    2 large tomatoes, chopped

    400ml can of coconut milk

    2 teaspoons tamarind paste stirred into 2 tablespoons water

    2 tablespoons peanut butter

    1 tablespoon agave nectar

    0.5 teaspoon of salt

    Section 3: To Finish and Garnish

    200g cashew nuts

    juice of a lime

    3 spring onions, sliced diagonally


    Instructions

    1. Put the cashew nuts in a cup and pour in boiling water to just cover them.
    2. Splash some vegetable oil in a large saucepan so it just covers the bottom, add the onion and salt, stir and sweat on the lowest heat for about ten minutes until softened.
    3. Add the garlic and stir.
    4. Add the ginger and stir.
    5. Add the turmeric, coriander, cumin, dried chilli flakes, give another good stir, and grind in some black pepper.
    6. Add the tamarind water.
    7. Add the potato pieces so they start to absorb the flavours, followed by the chopped tomatoes. Add a little more water to loosen the mixture if necessary.
    8. Add the coconut milk and stir.
    9. Allow the curry to come slowly to the boil and simmer for about 30 minutes until the potatoes have softened. (Now is a great time to start cooking your rice).
    10. After 15 minutes of simmering, stir in the soaked cashews along with their soaking water.
    11. Just before serving, stir in the peanut butter, half of the lime juice, and the agave nectar.
    12. Serve hot, garnished with the sliced spring onions, a final squeeze of lime, and an optional pinch of dried chilli flakes.

    Notes

    Time-Saving Shortcut: If you want to skip blooming the spice base from scratch, you can replace the spice list with 2–3 tablespoons of a store-bought paste. I highly recommend Maesri Masaman Curry Paste because it is authentically flavored and naturally 100% vegan. Be very careful when shopping for other commercial Thai brands, as many standard curry pastes contain hidden shrimp paste or fish sauce even if the front packaging looks vegetarian. Always read the allergen warnings on the back carefully

    • Prep Time: 15
    • Cook Time: 30
    • Category: Vegan Dinner
    • Method: Boil
    • Cuisine: Asian

    Nutrition

    • Serving Size: 1/4 of recipe
    • Calories: 710
    • Sugar: 11g
    • Fat: 47g
    • Saturated Fat: 16g
    • Carbohydrates: 57g
    • Fiber: 7g
    • Protein: 17g

    Tips for the Perfect Vegan Massaman Curry

    * **Uniform Cooking:** Cut your potato chunks into equal sizes so they all soften at the exact same rate during the 30-minute simmer.

    * **Taming the Spice:** If you prefer a milder dinner, reduce the dried chilli flakes by half or skip the final garnish pinch entirely.

    * **Storing Leftovers:** This curry tastes even better the next day! Store it in an airtight container in the fridge for up to 3 days. If the sauce thickens up too much while chilling, simply stir in a small splash of warm water or vegetable broth when reheating to restore that rich, velvety takeout texture.

    As an Amazon Associate, I earn from qualifying purchases.

  • Kuching ‘Cat City’

    River Houses

    Kuching is a bustling city on the banks of the Sarawak River on the island of Borneo.  There are tourists inevitably, but it’s off the beaten track enough to be exotic and not like anywhere else, making it an interesting city to explore.  You will find plenty of unique shops, cafes and restaurants (unique apart from a branch of that nasty virulent golden arch chain) and there is big bargain department store (go here especially if you are in need of a new rucksack for the rain forest).

    Palace

    The bench-lined river promenade is a great place to start sightseeing or to sit and watch the colourful boats.  I was lucky enough to chance upon the annual regatta. There are long sunset river cruises culminating in a show performed by exquisite traditional dancers.  People squealed as a small crocodile swam along the surface close to the boat.   If you feel up to braving a smaller (infinitely more capsizable) boat and forget about the aforementioned crocodile there are short expedient rides to take you across to the grassy residential shores of the opposite bank, the site of the Astana, the residence of the Sarawak governor built by a certain Charles Brooke in 1869 and where via loud speakers there is sermonising on the word of the prophet Mohammed.

    Here Be Dragons

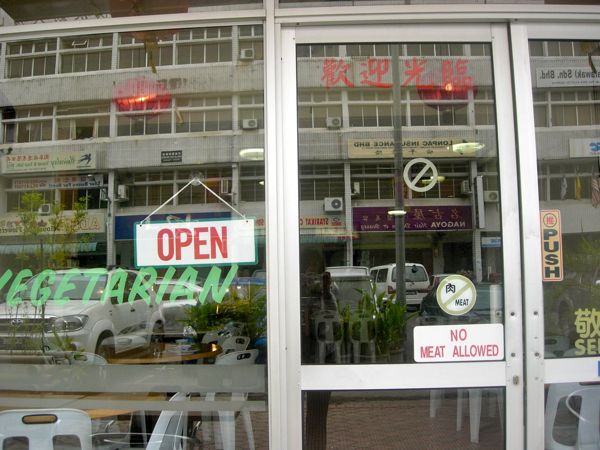
    A Singaporean friend had recommended that I try the local delicacy ‘midin’, an edible jungle fern native to Sarawak and I found it in the cafe ‘Zhun San Yen’ near the river. After having the delicious samphire-like vegetable along with lots of other delicious dishes at this cafe run by Bhuddists I became a semi-regular (bolstered by my calamity of forgetting to take any money on my second lunch and the owners being totally cool with me bringing it when I came down later).  All the dishes are vegetarian, some using the traditional Chinese style of cooking with faux meats and they are all delicious.  The self service buffet is charged by weight (economical and handy for the budget conscious) and the staff are charming.

    No Meat

    Away from the river the town is a busy hive of streets.  Apparently it’s uncertain whether the word ‘Kuching’ derives from the Malay word for cat ‘kucin’ or from the Chinese word for port ‘cochin’ but there are numerous cat statues and even a cat museum (I know where I’d put my money).   Around town there are lots of interesting buildings, temples both Chinese and Indian and a magnificent mosque as well as a colourful dragon-filled Chinatown.

    Cat City

    The breathtakingly beautiful Reservoir Park was a spectacular find.  Take the opposite direction from river, setting out from the Pullman hotel and a twenty minute or so stroll from the city centre (anyway you’ll need a map but they are easy to come across)…

    Beautiful Park

    At night the river esplanade seems to be the real heart of the city, it’s full of people taking the air, strolling or sitting at the food stalls. However; if you find exploring the city on foot thirsty work and want something a little stronger there are places around that serve cocktails, beers and wines.  Larger hotels and some cafes and restaurants sell alcohol, but not all of them, this being a muslim country.  My Rough Guide recommended a ‘lifestyle bar’ called ‘Tao’ on Jalan Padungan. After an walk around streets filled with little shops selling hardware and tiny restaurants selling Indian or Malay food, amongst the hustle and bustle of city life, people sitting at the front of their shops enjoying the cooler balmy nights.  I found the address, now called 175 it was a really cool place; friendly staff, healthy food with vegetarian choices and smoothies but cocktails and wine and beers too; music, sofas, a couple of floors and discrete areas and best of all a free fish pedicure for every customer while they sip their drinks.

    Cat Statues

    Next: Iban longhouses and crocodiles

    As an Amazon Associate, I earn from qualifying purchases.

Clicky
error: Content is protected !!